10.13.2010

Getting Ready For Halloween


It's starting to look spooky here...
Our entry way is shrouded with cobweb curtains full of spiders and bats fluttering overhead...

Our living room is home to 3 extra large bats flying inside the window & family pictures have been replaced with spooky silhouettes.  Plastic pumpkins trick or treat baskets have been stacked in the bookcase...
awaiting strobe lights & our Halloween party.

Not all our decor is spooky...Autumn is brought in with silk leaves in bright colors that I stitched onto branches from outside & grouped in 3 in front of a mirror.


How do you like to decorate for Halloween?

Spooky? Silly? Fun? Creepy?

Upload your Halloween decorating pictures to share on my Facebook fan page here. I can't wait to see what you've done.


9.27.2010

Homemade Play Dough

My kids love play dough...
even the older ones still like to make sculptures out of it....and it is so easy to make.  It makes a great rainy-day activity--the kids can help every step of the way...


Here's what you need:
3 cups flour
1 1/2 cups salt
3 cups water
2 Tb oil
1 Tb cream of tartar
food coloring
coconut, mint or any other extract you like to smell :)


1. Combine flour, salt, water, oil & cream of tartar in a large, heavy saucepan.  Heat over medium heat, stirring constantly until clumps begin to form (it will look really ugly for a while) and then forms into a bigger 'blob' and is too hard to stir with a spoon.  Remove from heat.


2. Allow to cool off a little, then turn out onto the counter and knead until smooth. Add the extract here if you like (I used coconut)...remind little kids that although it smells great--it doesn't taste good at all :)


 3. Divide play dough & place in resealable plastic bags. Squeeze in a few drops of food coloring.  Close the bag and smoosh it around a little to start to mix the color in...once there are no more pockets of food coloring (it will appear marbled) remove it from the bag and knead until a solid color...why do this? it keeps your hands from being multi-colored for a few days-once the color is mixed in a little, it won't stain your hands :)

Store in an air-tight container....Have fun!


Pin It

9.22.2010

Halloween Costumes

It's the time of year again to start thinking about Halloween Costumes!..we still haven't decided in our house.  I like to make our costumes--it's extra work (but I try to simplify...they don't have to be perfect for the kids to run around in them for one night...in the dark), I just can't justify spending so much money on pre-made, flimsy costumes.

Here's a few from years past...


Two Peas in a Pod
Since I made this one 8 years ago...I can't seem to remember how I made the pod :) the rest is a green sweatsuit with stuffed "peas" safety pinned on to her belly :) and a little green hat.

****

Witch & Ghost
These were two of the easiest costumes I've made...
the witch:
Make a pillow case dress, layer it over a black turtle neck & striped tights...and add a hat.
About the same for the ghost, only I did an all elastic neckline & lots a layers, a couple of shimmery-transparent cloth & a bleached cotton lining underneath.  Slip it over a white turtle neck & some white sweatpants & add a white stocking cap & gloves.

****

Fighter Plane & Princess

the pattern for the plane I found in a Family Fun magazine...
of course this was about 5 years ago...but you may be able to find it online still :)

****
Flower Fairy & Alligator
The Fairy hat is made out of crepe paper...you can find the directions for other crepe paper costumes on Martha Stewart's website ...the alligator...is one of the few costumes I've bought :)

****

3 Pirates
This was a year we found ourselves with out a lot of money...so I scoured the kids clothes for old, holes in the knees, worn out clothes & roughed them  up :) ...the only thing I had to buy...3 bandannas, the eye patch, the parrot & 2 pairs of striped socks.

****
Cowboys & Indian
(or Native American...as my daughter would say) :)
For the Indian I found this great "suede" costume fabric at Jo-ann's with nice cut-out details, I just strung beads on to the fringe.  I made a very simple, almost poncho-like shirt & a simple tube skirt.
For the Cowboys I made the vest & chaps....the chaps are lined with old white towels (for the sheep skin look).

****

Mario, Luigi & Princess Peach

For Princess Peach I altered a princess costume pattern to get the right look, her crown is made from fun foam with a little glitter added.
For the boys, I used their pants as patterns & added the overall tops. Their mustaches are felt, stuck on with a little eyelash glue.  I found their hats on Amazon.

What's the favorite costume you've made?
(mine was the Mario Bros & Princess Peach)

If you like another idea...here's a tutorial for


9.10.2010

My favorite time of the year...

I am so excited for fall to arrive...I love everything about autumn, the cooler weather, the smells, the colors, the food, being wrapped up in sweaters and blankets all cozy....
Here on the east coast it's still warm (too warm I think)...but, the leaves are starting to change, the first hints of yellow (and a little red) are showing up..it's a good sign :)

**hints of yellow in the woods out my back door**

Here's a treasury I put together....
it makes me feel like fall's in full swing...

you can visit it here.

you can also visit these other treasuries I've been featured in:

Are You Ready For Some Football by Stellasknits

No Purple Pumpkins by laurastirrett

The Makings of One Spooktacular Party
by littlebeeps

Going Batty by AnRocaid

Football Season by knmoreau

8.26.2010

Back to School Breakfast...

 Here's a few simple ideas to make your back-to-school breakfast a little more special....with out a lot of effort (or spending a lot of money--I had everything on hand)

1.The banner...not my most elaborate (or even cutest banner), but I like it.  Just print off letters (I spaced them out 4 per page...adjust your margins to be .25 each) in a cute font & color...mine are sized at 300 pts.  Cut out each letter evenly, punch holes in the top of each corner, thread onto yarn or thin ribbon (I used variegated blue & green yarn) & hang up.
 
2. The Cards. This year I had in my mind I wanted to make cards for each of my kids, with a special note for each of them...when I found this cute (and a little cheesy) poem online it brought my whole theme together "May this school year bring You happiness galore, and may you enjoy it- right to the core".  So I printed it out in a fun font (in brown) Googled an apple image & found one I liked then used it to make a stencil and paper piece the apple together.  (to do this cut out the outside of your image, trace onto a piece of cardstock, then cut out the different layers of the original print out...i.e. the white part of the apple...trace onto the colored papers you like & glue together...I didn't make a template for the seeds, leaves & stem...those are easily free-handed).  I attached the poem with red eyelets to the stripy paper and then glued the apple on.

4. The place markers. First I made the flags by cutting out an approx. 1 3/4 x 4 inch strip of paper.  Fold the paper in half. Cut a skewer about about 4 inches from the pointed end (keep this end, find another use for the rest).  Wrap the paper around the blunt end of the skewer and use double sided tape to secure the paper to itself & the skewer.  Cut paper into a pennant shape & write the name on it, then poke the pointed end into the side of an apple, at an angle.

5. The Centerpiece. I arranged books and a "bouquet of newly sharpened pencils" (from You've Got Mail...I love that movie) and a little 'r' (for our last name)....super simple, but it does the job :)

Have a great school year! :D


8.23.2010

Treasuries...

Here's a couple treasuries I am featured in right now...one for each shop :) Be sure to stop by and show them some love (click & comment) & visit the great shops...

1. "Triangles" by amybunz16


8.20.2010

Back from Vacation & Ready to Craft :)


We're back from our 6 week vacation to Wyoming
(more details here)
I missed creating a lot...I'm usually in need of a project to keep me busy, although I did help make curtains for my Dad & Mom's farmhouse they just moved into..and made a few little gifts for my nieces 3rd birthday.
So now I'm back & here's a little hint of what I'm planning...
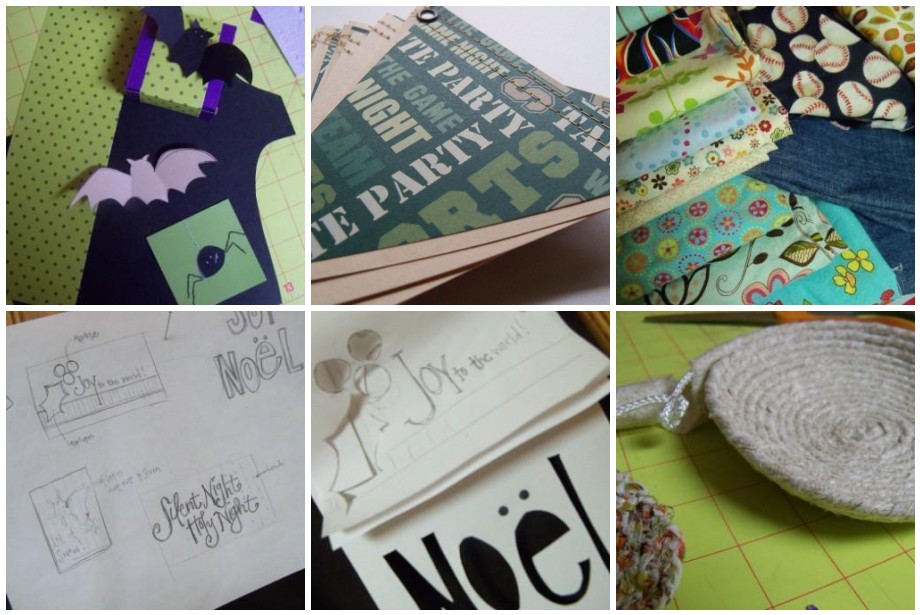
for Anticipation Cards I'm busy getting ready for Halloween & Autumn (my most favorite time of the year)...making some favor boxes, banners and other cute stuff :)...I'm also looking forward to the Holidays & will be starting Christmas & Holiday card sets soon.

At See Anna Sew I'm still working on getting the shop off the ground...leaving on vacation a month after opening doesn't help :).  Watch for more crayon & pencil rolls (I was able to go to a Hobby Lobby while on vacation & picked out some great fabrics....I wish we had one here).  I'm also working on some fabric-wrapped rope baskets, coasters & trivets (a technique I learned in a high school home-ec class) I love how mine is turning out.
I'm also working on shopping bags that I patterned after plastic grocery bags...that will be made out of homespun fabrics (I'm still working out a few kinks)


And keep in mind...holiday season is coming up fast...so watch for lots of tips and tutorials for holiday parties...I've already got a Halloween party in the works :)
Related Posts with Thumbnails