Showing posts with label Tutorial. Show all posts

7.23.2012

Video Game Party {the cake}


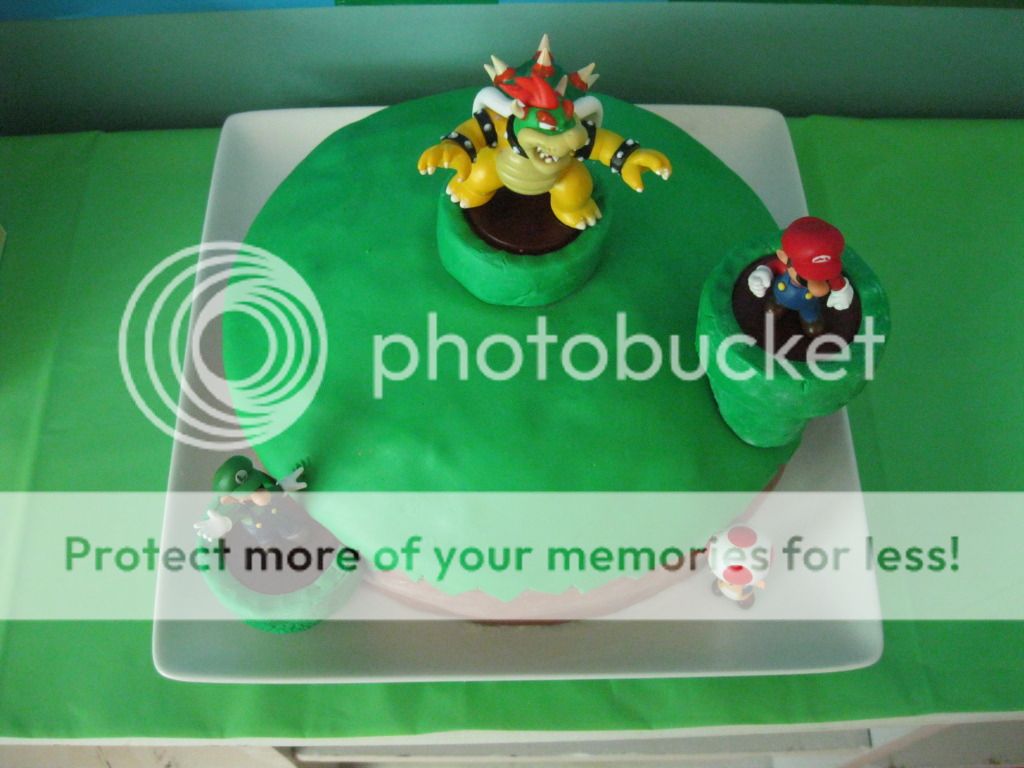
I'm not a super-fancy cake decorator, but I do my best :) I like to get as much impact out of it as I can without a massive headache.  Here's what I came up with for C's 


For this cake you need:
2 round cake layers, a nice rounded one for the top
Frosting of your choice
Chocolate Chips (opt)
Classic-flat bottom cake ice cream cones
Action figures :)


1. Frost your cake as you normally would :) 

2. Fondant...follow the directions on the link {scroll down for the recipe}  Add food coloring to get the desired effect.  I actually melted a handful mini chocolate chips  into the marshmallow/water mixture before adding the powdered sugar for the brown fondant...I was in a bind and it worked great...tasted pretty good too. Brown food coloring will work just as well:)

  Roll out a thin strip of brown fondant that is slightly larger then the height of your cake {so the green will overlap}.  Wrap around your cake and gently press to hold.  

Next roll out a thin circle of green fondant, again a little bigger than the diameter of your cake.  Carefully apply to the top of your cake.  Use scissors to cut away excess to form the "grass" top.

3. For the pipes, trim classic cake ice cream cones to fit your cake {see above pictures}.   Use a serrated knife and saw back and forth to keep from breaking your cones {it's good to have a few extra on hand}.  To wrap in fondant, wet the cone VERY LITTLE to help the fondant stick, then mold the fondant around the cone.  Use toothpicks or skewers through the center of the cones to hold the "pipes" in place.

4. Last, place your figures...the ones I used had a base that fit the open cones perfectly.  And add candles at the last minute :)

7.05.2012

Video Game Party {the favors}

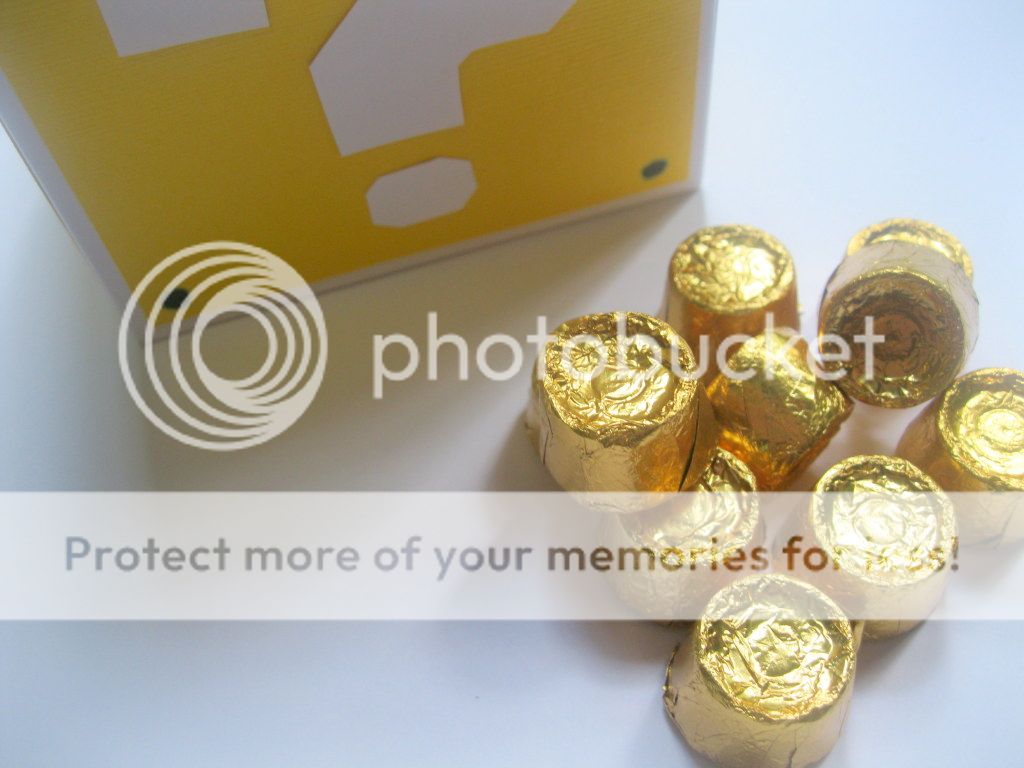
What could be better than taking home your party loot in true Mario Bros. style?  These "question mark block" boxes were a big hit at C's party.  


Here's how to make your own....


You will need:


>4 x 4 x 4-inch plain white boxes (mug size...look for them near the gift bags at your local craft stores...aka Michael's, they come flat so you will have to assemble them)


>Bright yellow card stock, cut into 5 3/4-inch squares, you will need 5 squares per box, so plan accordingly


>White card stock, cut into question marks.  You will need 5 question marks per box also...this is a little time consuming, but the end product is worth it! I used this to make a template...you will need to re-size your question mark to fit your boxes.


>Black marker


Assembly is simple, after your pieces are cut out, affix your question mark in the center of each yellow square.  Then a yellow square to each side (except the bottom) of your assembled boxes.  Carefully draw a black dot in each corner.  And you're ready to go!


FYI....individually wrapped Rolo candies make great Mario Bros. "coins".  We found lots of favor filler options here (and at a reasonable price :)

6.13.2012

Video Game Party {the invitations}


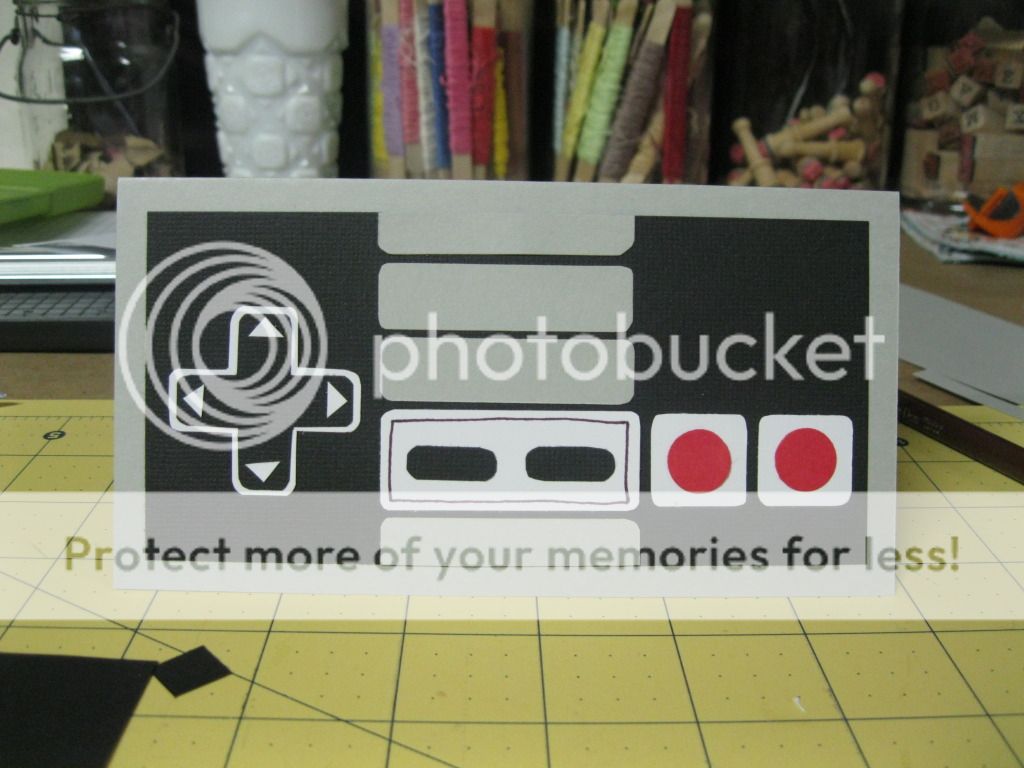
For this party, I decided to make a classic, old school Nintendo Controller...it's the perfect shape for an invitation:)
This is a small invite, only 6.25 x 3.5 inches, that fits into a standard letter envelope.  It's simply layered card stock, with a little black hand outlining in the center. A template for you to use is below, click on the link to download or print {for non-commercial use only please!}


I printed my party info inside each card before assembly (remember to adjust your margins & print out a draft to make sure it all lines up right).  You can just as easily write or stamp the party info on the inside.  I used this great (free) video-game looking font: Unibody 8 


Invitation Template Inviation Layout

4.04.2012

The 5 Days of Spring Break {day 3. popsicle stick bracelets}

H and I had a great time making these bracelets together.  These are the perfect size for her {she's going on 10}, and if I can find some craft sticks big enough, I'll be making some for me too :)


I've seen some tutorials around to make these using a drinking glass to mold them.  Honestly, it didn't work out so great for me.  One, I don't have drinking glasses that small, or that have straight sides.  Two, I had a problem with them not staying put & popping out.  I really wanted to make these with H, so I set out to find the best way & after a couple attempts, here is what I came up with:


Supplies:

*Wooden craft sticks (we used 6 x 3/4 inch)
*Saucepan & water
*rolling pin
*zip ties that are a few inches longer than your craft sticks
*Strips of paper cut just slightly longer & wider than your craft sticks {it's always easier to cut away excess, then try to line up perfectly}
*Decoupage glue {such as ModPodge}
*Scissors


1. Place your craft sticks in a large sauce pan, cover generously with water.  Bring to a boil over high heat and boil for at least 15-20 minutes {the longer you boil, the softer the sticks become}
Drain, and allow to cool slightly {they cool off rather fast}.


2. I used a rolling pin to mold the initial curve, by wrapping the craft sticks around then letting them go...just made it a little easier to bend them in the next step.
3. Loop around a zip tie & secure on the first notch (biggest loop) possible.  Mold your craft stick into the zip tie, try to overlap the ends just slightly so that the ends curl around too.  Tighten the zip tie.  You want to mold these on the small size.  They will expand when you un-mold & decorate them.


4. Allow to dry over night-24 hours...make sure the are good and dry.


5. Un-mold and decorate.  It's best to follow the directions on your decoupage glue, but here's how I do it: brush a thin layer onto the craft stick; adhere paper, then trim excess; add multiple layers of glue on top using a brush, allowing to dry in-between each; sand lightly if necessary.


**if the bracelets expand a little too much after decoupaging, just slide them back into the zip tie {carefully!} after they are dry to the touch and leave for a few minutes, it doesn't take long to get them back into shape.**
You don't have to stop there, try decorating them other ways :) Instead of decoupage try wrapping with thin ribbon, yarn or string.  Glue all sorts of rhinestones and gems on...or simply color with markers (just don't use washable).  Have fun creating!

5.16.2011

Make Your Own Cake Topper

I'm sure you've seen these around (maybe even in my shop)...adorable cake toppers that add a fun and unique look to any birthday cake (or any other cake honestly)...and they are easy to make, here's how:

1. Cut two strips of paper 2 x 12 inches each.  Score at 1 inch and fold, using a bone folder to get a good edge.  Now you should have 2 strips of paper 1 x 12 inches each.


2. Make a triangle template out of scrap paper...mine  has sides of 1 1/8 inches and is 1 inch long from tip to center top.  You can make the triangle any size you like, as long as it is not larger than your strip of paper.

 3. Line the top of your triangle template along the fold of your strip of paper and start cutting out triangles.  You will have extra, non-folded triangles left over...save them for another project.

4. Stick two, 10 inch bamboo skewers (found in the kitchen utensil department of most stores) 8 inches apart into a piece of thick Styrofoam.  Tie strings across, making sure they are tight (but not too tight).  Wrapping the strings around the ends a few times  helps the strings stay secure (you will glue the strings in place in the final step).


5. Now to add our triangles...I like to use a glue dot roller, you can use whatever adhesive you have on hand though.  Add a little glue to the inside of your triangle flag, making sure to get some over the crease-this will keep it in place.  Fold the flag over the string and press into place.  Repeat with remaining triangles, spacing them as evenly as possible.

 6. Move your skewers so they are a little closer together and the strings drape a little.  Adjust the strings so that they are evenly spaced & you like how it looks.  Glue the knotted ends of the strings to the skewers with a little dab of super glue or other clear glue.  Let dry & remove skewers from Styrofoam.  Before decorating your cake, wash & dry the ends of the skewers that were in the Styrofoam.

Now that you have the basic idea...here's a few more ideas.  And if your not feeling crafty, you can find all these in the Cake Topper or Birthdays section of my shop (either alone or added to my new birthday party kits) & I'll do all the work for you :)
Pin It

4.12.2011

Sugar Eggs for Easter


For the eggs, you'll need:

1. Mix 1 cup sugar with 1 tsp. water and a few drops of food coloring.  Mix well with your hands until all the sugar is dyed (you can wear gloves for this if you like, but the sugar keeps your hands dye-free).


2. Press sugar firmly into your mold.  I used large, plastic easter eggs.  You can also use egg shaped molds found in the cake decorating or soap making aisle at your craft store.  You can also find them on Etsy.


3. Gently scoop out some of the sugar from the center, making sure you leave a good edge.  You will be able to make the egg thinner in the last step.  Make sure the sugar is still packed into the mold tightly.

4. Carefully turn eggs out onto wax paper (like you are building a sand castle).  Allow to dry for a few hours to overnight (I think overnight is best).

**Each batch of sugar made two of my easter eggs with a little left over...It made one large egg. If you like you can use the leftover sugar to make marbled eggs, by just packing in 2 or 3 colors**

5. When the eggs are comletely dry, use a table knife to clean up edges and scrape out the center of the eggs a little more.


Now we're ready to decorate, for the Royal Icing you need:

1. In a large bowl, with a mixer fixed with a whisk attachment.  Slowly mix together 1/4 cup meringue powder (available in the cake decorating aisle) and 6 Tb. of water.  Scrape down the sides as needed.  When mixed well turn mixer up to high and beat until stiff peaks form.  Add powdered sugar and beat until thick and fluffy.  It should look like this <---. 

2. Add coloring to your icing if you like.  Fit your pastry bags with couplers and decorating tips.  Fill bags with icing.  Royal icing dries very quickly, cover any leftover icing with a damp cloth.

3. Decorate...have fun and be creative :) I added little sugar pearls to mine...there are lots of sprinkles and decorations that would be fun to add.  Allow icing to dry and fill with jelly beans or small candies...Although the eggs may look tasty, I don't recommend eating them :) 
Happy Easter! 

Pin It
Related Posts with Thumbnails