4.26.2012

Nutella and Banana Mini Hand Pies

This is one of our family's favorite flavor combinations (try a small scoop...a teaspoon or so...of Nutella with sliced bananas in your hot cereal...yum), so for a quick desert on night I made these.  Needless to say, they were a big hit...


Ingredients:


Pie crusts-from your favorite recipe, or the dairy section of your super market :)...we used pre-made this time to make it a little easier.


Nutella


Finely diced banana, one banana was plenty for us


1 egg beaten with a little water (egg wash)


How to:


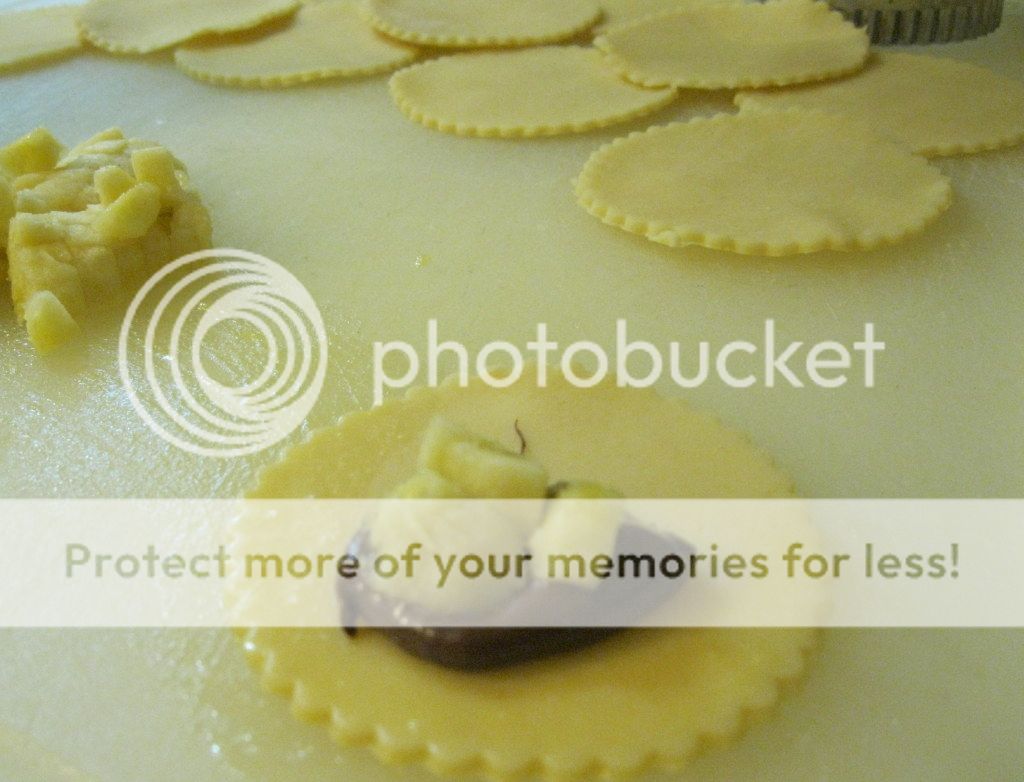
1. Cut circles from your pie crust.  It's best to do this assembly line style, so cut out all the circles you can.  We used a 3-inch scalloped biscuit cutter.


2. Place a small dollop (scant teaspoon) Nutella and a few pieces of banana on one half of the circle.


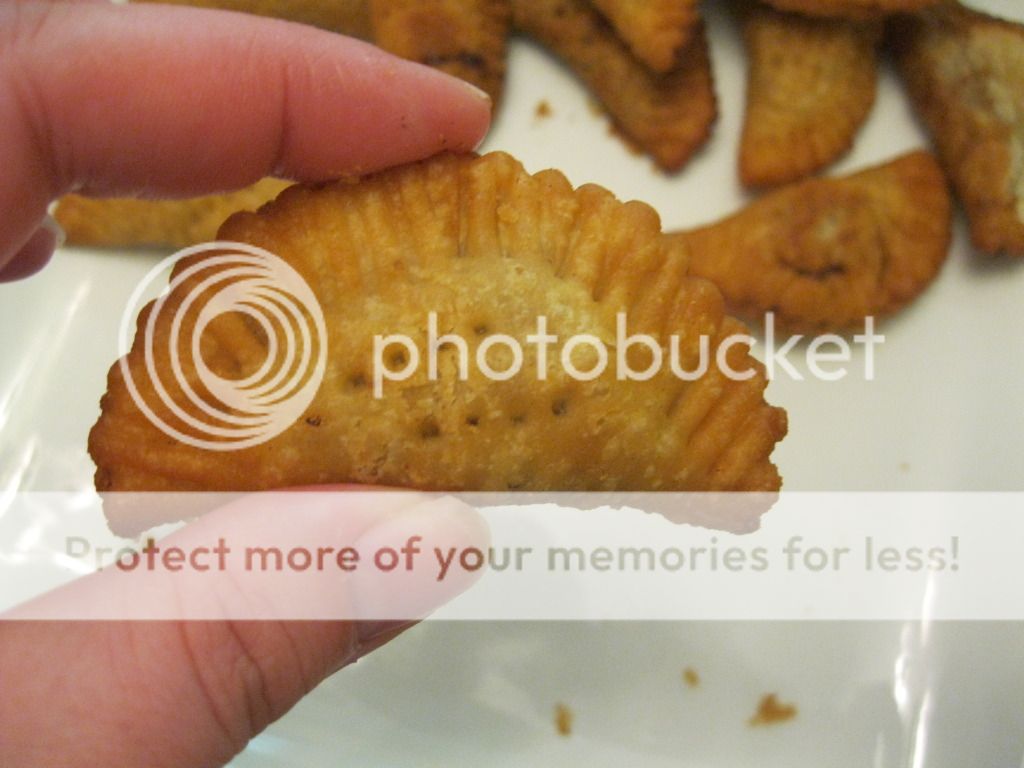
3. Brush edges with egg wash, fold the opposite half of the circle over the filling and press to close. Use the tines of a fork to press around the outside edge to seal it a bit more.


4. Heat oil to 350 degrees.  Fry pies a few at a time until golden brown...only a minute or two per side--watch them they cook up quick. Remove to a paper towel to soak up excess oil.
If you prefer a quicker (and healthier) option, bake in a 350 oven until golden brown.  Allow to cool a few minutes (filling will be HOT) and enjoy!


4.13.2012

it's a GIVEAWAY!

Looking to win some great products?  
Lila at L Photography is having a HUGE giveaway celebrating her 1000 Facebook fan!
And both Anticipation Cards & See Anna Sew are participating :)

Visit her blog here
or 
Her Facebook Page here


Make sure to take a look at her photos--she does an awesome job!

4.09.2012

The 5 Days of Spring Break {day 5. finger crochet}


...or maybe you call it finger knitting...either way it's an easy (and addicting) way to keep little hands busy.  Would be great for a long car ride too.  Here's what to do...


1. tie a loop of yarn around your index finger.
2. Weave yarn over and under each finger to your pinky then back to your index finger.


3. Lay yarn across your fingers above the looped yarn.


4. Pull each loop up and over the top yarn then over the finger tip.  Repeat for each finger.


5. Going the opposite way, lay yarn over fingers as in step 3.


6. Repeat steps 3-5 until you get the length you're looking for.  {If you need a break, carefully slide yarn off fingers and onto a pencil for easy keeping without unraveling your work}

7.  To finish, cut yarn then thread the loose end through each loop {we found it easiest to put loops onto the pencil then thread yarn through}. Pull string tight and knot the end.


4.05.2012

The 5 Days of Spring Break {day 4. basic watercolors}

What kid doesn't love to paint? I know mine do & watercolors are a perfect medium to work with.  Not only do they clean up easily & are inexpensive, it's easy to try different techniques.

Here are a few basics...

1. Tape your paper down {masking tape works best to keep your art intact}.  When you use water colors the paper tends to curl up, make sure you tape all the edges down to keep that from happening .  Use watercolor paper or paper made for paint and markers.

2. Lightly wet the entire surface of the paper.  This will help your water colors "flow".  Use a good amount of water when painting, water colors are not meant to be bright and bold.  Make a mistake, simply dilute it with a little water & paint over it...just be sure to not use so much water that your paper begins to tear.  Less water = brighter colors, more water = lighter colors.

3. Watercolors are a great way to practice mixing colors.  Paint stripes of two different colors near to one another,  see what happens when they meet & the colors begin to blend together.  Go beyond the basics of red & yellow make orange...or blue and yellow make green.  Experiment with your colors!

4. Use salt.  This is a fun and easy technique that kids love to watch.  While the paint is still wet, sprinkle with salt.  Try different types with varying coarseness. Allow your paint to dry completely, then brush the salt off. We used table and kosher salt...


5. "Secret messages"...as my 7 year old dubbed them.  Use a white crayon to write a message or draw a design before wetting the paper.  The crayon will repel the paint. 

6.  Try blowing the paint around with straw...or use a sponge after painting to pick up color & leave a design.  Be creative, water colors are very forgiving :)


 **watch for an upcoming tutorial on how to make your own gallery wall-- just like mine.  It's a perfect place to post all your kids' art work**

4.04.2012

The 5 Days of Spring Break {day 3. popsicle stick bracelets}

H and I had a great time making these bracelets together.  These are the perfect size for her {she's going on 10}, and if I can find some craft sticks big enough, I'll be making some for me too :)


I've seen some tutorials around to make these using a drinking glass to mold them.  Honestly, it didn't work out so great for me.  One, I don't have drinking glasses that small, or that have straight sides.  Two, I had a problem with them not staying put & popping out.  I really wanted to make these with H, so I set out to find the best way & after a couple attempts, here is what I came up with:


Supplies:

*Wooden craft sticks (we used 6 x 3/4 inch)
*Saucepan & water
*rolling pin
*zip ties that are a few inches longer than your craft sticks
*Strips of paper cut just slightly longer & wider than your craft sticks {it's always easier to cut away excess, then try to line up perfectly}
*Decoupage glue {such as ModPodge}
*Scissors


1. Place your craft sticks in a large sauce pan, cover generously with water.  Bring to a boil over high heat and boil for at least 15-20 minutes {the longer you boil, the softer the sticks become}
Drain, and allow to cool slightly {they cool off rather fast}.


2. I used a rolling pin to mold the initial curve, by wrapping the craft sticks around then letting them go...just made it a little easier to bend them in the next step.
3. Loop around a zip tie & secure on the first notch (biggest loop) possible.  Mold your craft stick into the zip tie, try to overlap the ends just slightly so that the ends curl around too.  Tighten the zip tie.  You want to mold these on the small size.  They will expand when you un-mold & decorate them.


4. Allow to dry over night-24 hours...make sure the are good and dry.


5. Un-mold and decorate.  It's best to follow the directions on your decoupage glue, but here's how I do it: brush a thin layer onto the craft stick; adhere paper, then trim excess; add multiple layers of glue on top using a brush, allowing to dry in-between each; sand lightly if necessary.


**if the bracelets expand a little too much after decoupaging, just slide them back into the zip tie {carefully!} after they are dry to the touch and leave for a few minutes, it doesn't take long to get them back into shape.**
You don't have to stop there, try decorating them other ways :) Instead of decoupage try wrapping with thin ribbon, yarn or string.  Glue all sorts of rhinestones and gems on...or simply color with markers (just don't use washable).  Have fun creating!

4.03.2012

The 5 Days of Spring Break {day 2. pinwheels}


Pinwheels are perfect for a sunny spring day...and making your own is as easy as it gets. Simple enough for almost any age, if you can use scissors, you can make a pinwheel. Here's how...  

Gather your supplies.  You will need:
*squares of paper, ours are 6 inch squares
*un-sharpened pencils
*ball head straight pins
*scissors
*paper piercing tool (optional)
*sharpened pencil
*ruler
--------------------------------------------------------------

1. Draw a line from each corner about 3 inches long toward the center.  Regular weight paper works best for this project.


2. Cut along drawn lines, erase pencil marks.


3. You now have 8 points on your square.  Pierce every other corner {one per section}.  This step is optional, but it makes it just a bit easier when pinning.


4.  Working  with the wrong side {white side} of the paper towards you.  Curl around the first point and stick your straight pin into the first marked corner, from the printed side of the paper. {The head of the pin should show on the printed side}.  Continue with every marked corner, holding the paper on the pin as you go around.


5. Push the pin through the center of the pinwheel and into the eraser of an un-sharpened pencil.  Place the pin in to the eraser near the metal, then push the pin downward until it hits the metal on the opposite side, so that the pin cannot poke through & hurt little fingers :).  Bend the pin slightly so that the pinwheel is parallel with the pencil.


And your done...have fun!


4.02.2012

The 5 Days of Spring Break {day 1. Cornstarch Quicksand}


Cornstarch Quicksand
This is a super EASY and fun science experiment for kids.  It keeps my kids occupied for the better part of an afternoon, easily.  It looks super messy, buy believe me, it cleans up very easily with just water :)

Cornstarch quicksand is a Non-Newtonian Fluid, meaning it has properties of both a liquid and a solid.  Have fun testing how it reacts to pressure, when it is squeezed & when pressure is released...what happens when an object is placed on top or when an object sinks into the mixture...just have fun!

Here's what you need:
1 part water {1/2 cup}
2 parts cornstarch {1 cup}
food coloring...if you like...I opt to not add it :)
Just mix it up...It works best when you use your hands.
Then start experimenting!


It's hard to get a good picture of what happens with the quicksand, so here are a few videos of my kids in action {sorry about any baby babbles in the background} :)


Related Posts with Thumbnails