So...I've decided to move to a new blog {after a long debate with myself} that fits my point of view better...don't worry, there will still be lots of great tutorials and party ideas :)
You can start reading here {don't judge too quickly, I'm just getting it up and running}
I hope to see you there :)
{all the content of this blog will remain, and I will be linking all the ideas, recipes & tutorials to my new blog.}

11.30.2012
8.29.2012
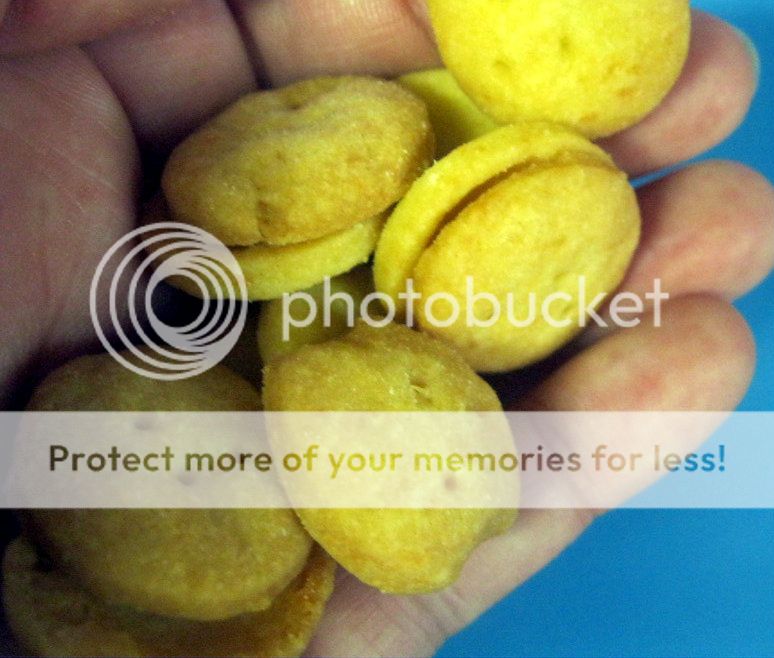
{pinned there, done that} Cheese Crackers

aka...Cheez Its...my oldest INHALES them, he would easily eat an entire box in a sitting if he could get away with it. So I decided to try out this pin.
The dough came together easy enough, here are some tips...

*I don't like to roll things out using plastic wrap, so I rolled them right on a lightly floured counter and used a small off-set spatula to move them to the cookie sheet.
*you can place the crackers close together, the recipe says 1/2 an inch apart...and 1/8 of an inch is just fine. mine were almost exactly the same size around, just puffier.
*Cook closer to the 10 minute mark (or a bit longer). I took the first batch out a little too early, they were done & lightly browned, but the second batch I let go a little longer & they had more of the great nutty, toasty, cheesy flavor that you associate with cheese crackers.
*I used the wrong size of an extra large pastry tip to cut out my crackers.
The reviews? I liked them, they are a little tedious to make, and I'm not quite sure they are worth the effort on a regular basis. They would be great as part of a gift basket. My oldest son said they could be "cheesier", but liked them. Give them a try...let me know what you think :)
8.17.2012
{pinned there, done that} DIY Fabric Refresher
Lately I've been trying a lot of homemade cleaning supplies, not only does it save money, but I can't stand the choking chemical smells of most cleaners {plus they have to be healthier, right?}
This week I tried out this pin & made my own fabric refresher... aka "febreeze"

So far, it's worked. The kids said it smelled great. My 7 year old went on to say that it is "was very refreshment"....hahahaha...I love little kids.
Mine wasn't as strong as what you find at the store--which I don't mind at all--but it probably depends on the size of squirt bottle you use. Shake it well to dissolve the baking soda (you may need to do this before each use). And 2 tablespoons = 1/8 cup...don't get another dish dirty to measure the fabric softener :)
8.10.2012
{pinned there, done that} English muffin bread
Have you ever scrolled through Pinterest, pinning pin after pin, but really wondering "hmmm, does that really work?" or "can that really taste as good as it looks?" (or does it taste better than it looks...some of the food out there looks horrible)
So I've decided to run a new blog feature...weekly I'll test out something new that I've found on Pintrest...and tell you how they really work out, if they need any tweaks, or if you should just plain stay away :)

First up--this recipe for English Muffin Bread
The grade? an easy A
The recipe was very easy to follow, and came together very quickly. The hardest part was getting the batter evenly into the two pans...it's texture is a cross between a quick bread and yeast bread, it's pretty sticky(which really wasn't that big of a deal). Mine raised faster than the recipe said it would, although it is summer in southern Maryland :) It's easy enough that you could quickly put together a batch the night before for breakfast the next morning.
The entire family loved it. It has all the 'nooks and crannies' a good english muffin should have and a little bit of a chewy texture (which I love). It slices very well (no crumbly mess left in the process) and is fantastic toasted with butter and jam or for a fried egg sandwich.
So give it a try...I'll think you'll enjoy :)
{you can follow my boards on pinterest here}

8.08.2012
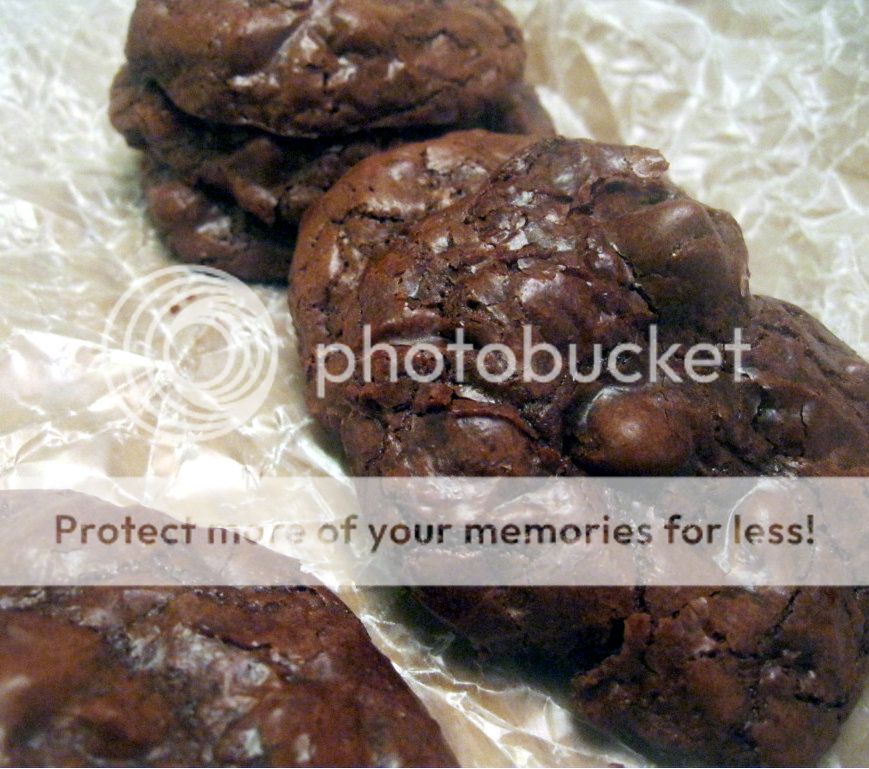
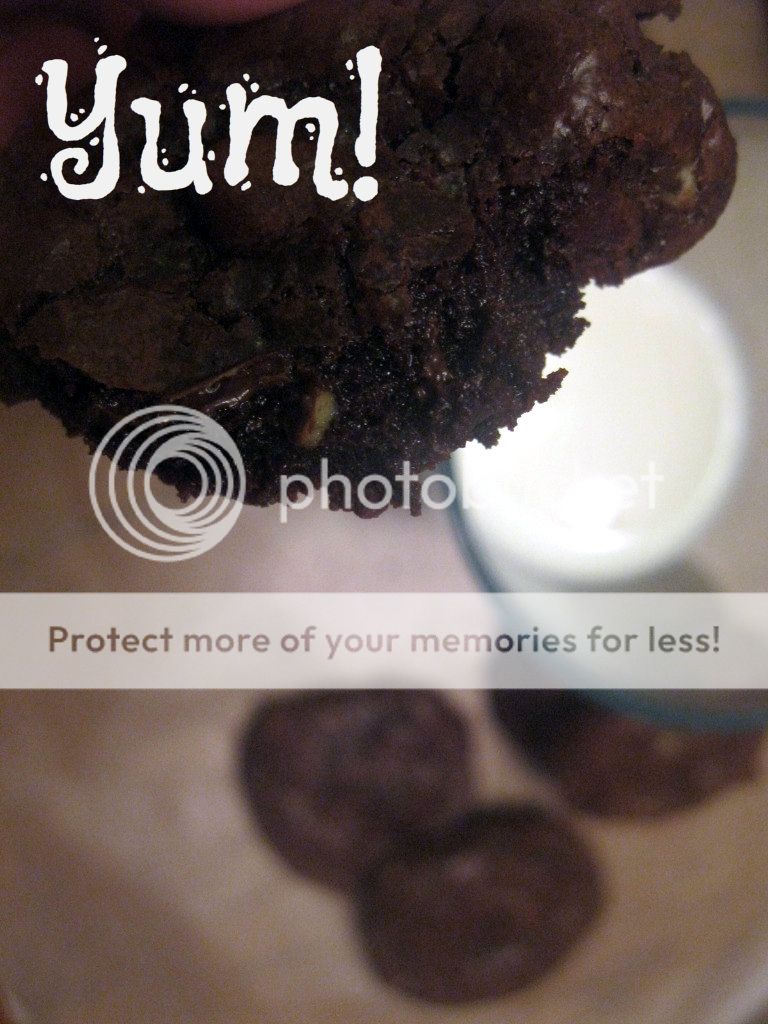
Minty Brownie Cookies

2 ounces unsweetened chocolate, chopped {see note below}
2 TB butter
2 eggs
2/3 cup sugar
1/4 cup flour
1 tsp. vanilla
1/4 tsp baking powder
1 cup chocolate-mint baking bits {look for 'Andes' in the baking aisle}
{I NEVER have unsweetened chocolate on hand, so here's what I do...per ounce of chocolate mix together 3 TB of unsweetened cocoa powder with 1 TB oil, add to recipe as directed}

In a double boiler {or a glass bowl fitted over a pan of simmering water} heat 1 cup of the chocolate chips, unsweetened chocolate and butter until melted, stirring constantly. Remove from heat.
Add the eggs, sugar, flour, vanilla and baking powder. Beat until combined, scraping the bowl down as needed. Stir in the remaining 1 cup chocolate chips and 1 cup chocolate-mint baking bits.
Drop by rounded teaspoons 2 inches apart onto a greased cookie sheet. Bake for 8-10 minutes until edges are firm and surfaces are dull and crackled {they look just like brownies}. Cool on a wire rack. Makes about 36 cookies.

8.07.2012
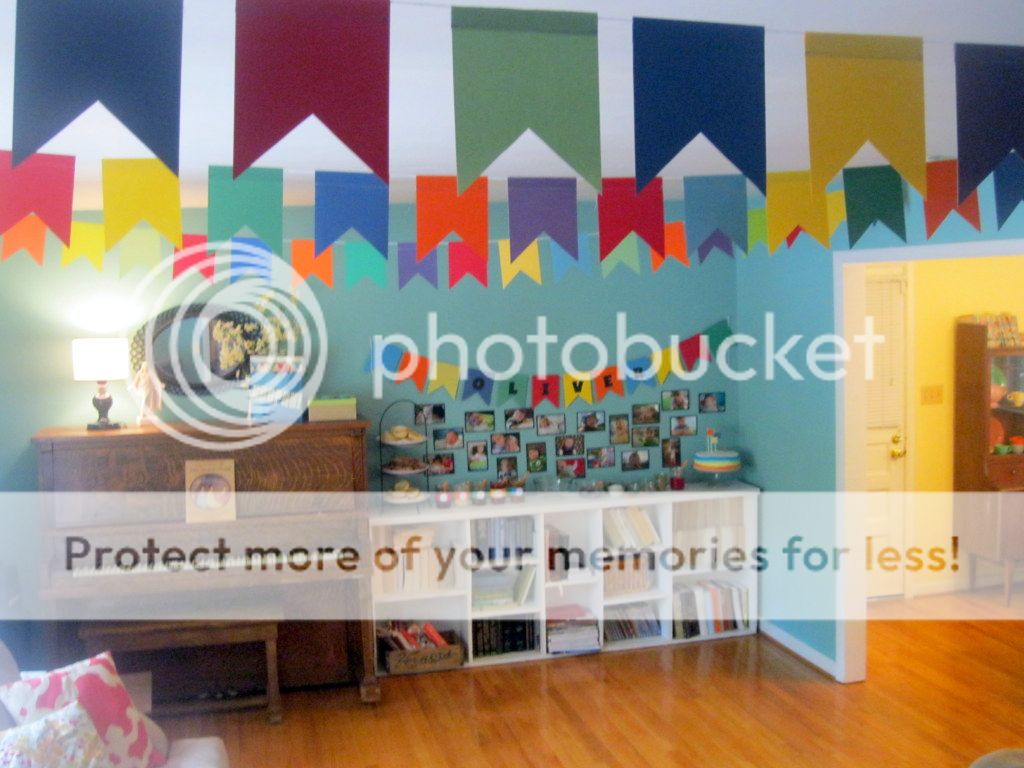
A First Birthday!

See the invitations here :)
The decorations were simple, but with lots of impact. Colorful buntings were hung overhead. A back drop of pictures from Ollie's first year all matted in black, were there for some reminiscing while fixing your sundaes and a banner with his name, later to be hung above his crib.


There were cute, crisp sugar cookie bowls to build your sundae in (tutorial coming soon). Homemade ice cream sauces (Chocolate, Marshmallow, Caramel, Strawberry & Peanut butter) along with a variety of sprinkles were served from mason jars. With homemade
whipped cream & crispy cinnamon sugar tortillas for toppings.

The cake was cute (albeit a little wonky...I'm still working on my cakes) with brightly colored marshmallow fondant stripes & topped with 3 little flags. And after a tentative taste of frosting Ollie had no problems diving in :)
Happy Birthday Ollie!

How to make:
Strawberry Sauce
Place one bag sliced frozen strawberries in a small sauce pan, add a little water (just a tablespoon or two) and sugar to taste (up to a half a cup). Heat over medium heat, after the strawberries have thawed use an immersion blender (or regular blender & then return to pan) to puree the strawberries into a smooth sauce. Heat to boiling over medium high heat and boil until it reaches 220 degrees (jelly stage) on a candy thermometer. Remove from heat and allow to cool. When cool transfer to a canning jar, store in the refrigerator.
Enjoy!

Colorful Bunting Birthday Invitations
Here's a super cute (and super simple) birthday party invitation idea...that just happens to be what I sent out for Ollie's first birthday party...

Here's what you need:
heavy white card stock (I like 110 lb for cards)
colored card stock, I used one color per letter in his name
sewing machine and thread
ink
letter rubber stamps
 1. Cut your white card stock to measure 4.25 x 5.5 inches. Fold in half. Cut out strips of colored card stock to be 1 x 1.5 inches, cut out a notch from the bottom to form the flag. {be sure to make enough for all the invitations you plan on sending out}. I printed out party info in a cute font onto the white card stock before cutting and folding. Play with your margins to get it right (and print out a proof just to make sure)
 2. Arrange your flags & adhere them with a little glue or double sided tape. Make sure you only use the adhesive near the BOTTOM of each flag...you don't want to gum up your sewing machine with the stickiness :) I had my end flags hang over the edge just a bit, then trimmed them even with the side of the card.
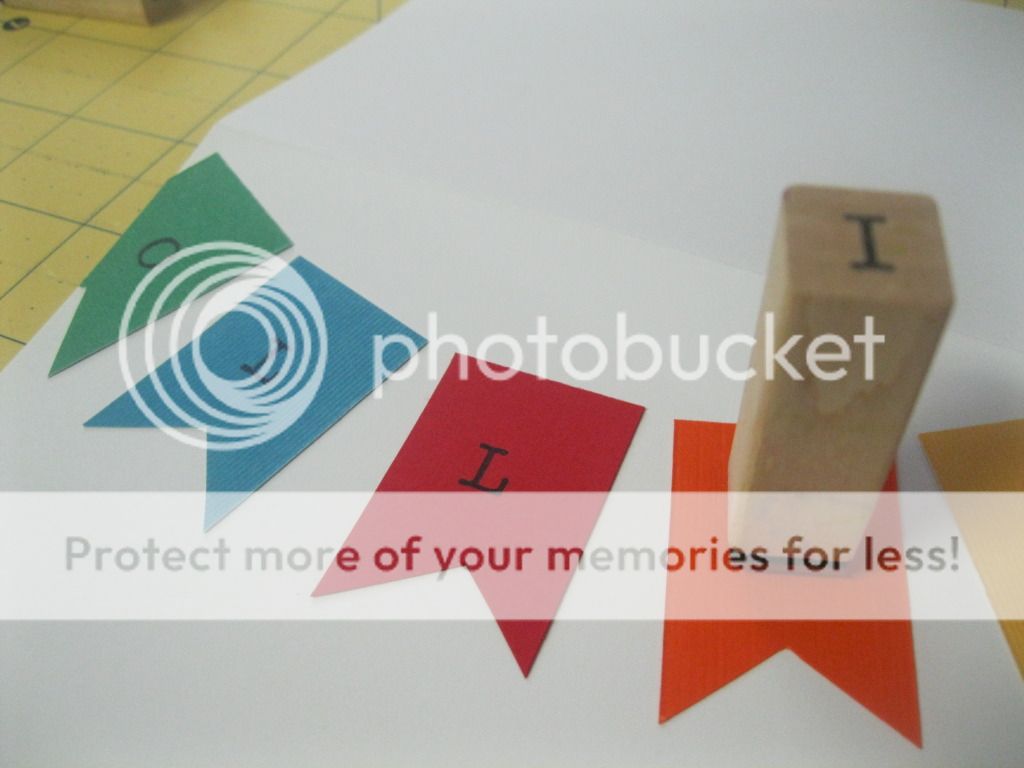
3. Stamp a single letter on each flag to spell out the name. And then below the bunting stamp: "Turns 1"...or any message that you like really :)
 4. Carefully (and slowly) stitch along the top of the flags to finish the bunting look. Be sure to back-stitch to secure your stitching. I cut the ends to about 1/3 inch or so, to look like ties for the bunting. Using a contrasting thread (I used blue) helps it to stand out.


Here's what you need:
heavy white card stock (I like 110 lb for cards)
colored card stock, I used one color per letter in his name
sewing machine and thread
ink
letter rubber stamps
1. Cut your white card stock to measure 4.25 x 5.5 inches. Fold in half. Cut out strips of colored card stock to be 1 x 1.5 inches, cut out a notch from the bottom to form the flag. {be sure to make enough for all the invitations you plan on sending out}. I printed out party info in a cute font onto the white card stock before cutting and folding. Play with your margins to get it right (and print out a proof just to make sure) 2. Arrange your flags & adhere them with a little glue or double sided tape. Make sure you only use the adhesive near the BOTTOM of each flag...you don't want to gum up your sewing machine with the stickiness :) I had my end flags hang over the edge just a bit, then trimmed them even with the side of the card.3. Stamp a single letter on each flag to spell out the name. And then below the bunting stamp: "Turns 1"...or any message that you like really :)
4. Carefully (and slowly) stitch along the top of the flags to finish the bunting look. Be sure to back-stitch to secure your stitching. I cut the ends to about 1/3 inch or so, to look like ties for the bunting. Using a contrasting thread (I used blue) helps it to stand out.
It's as simple as that :)

7.23.2012
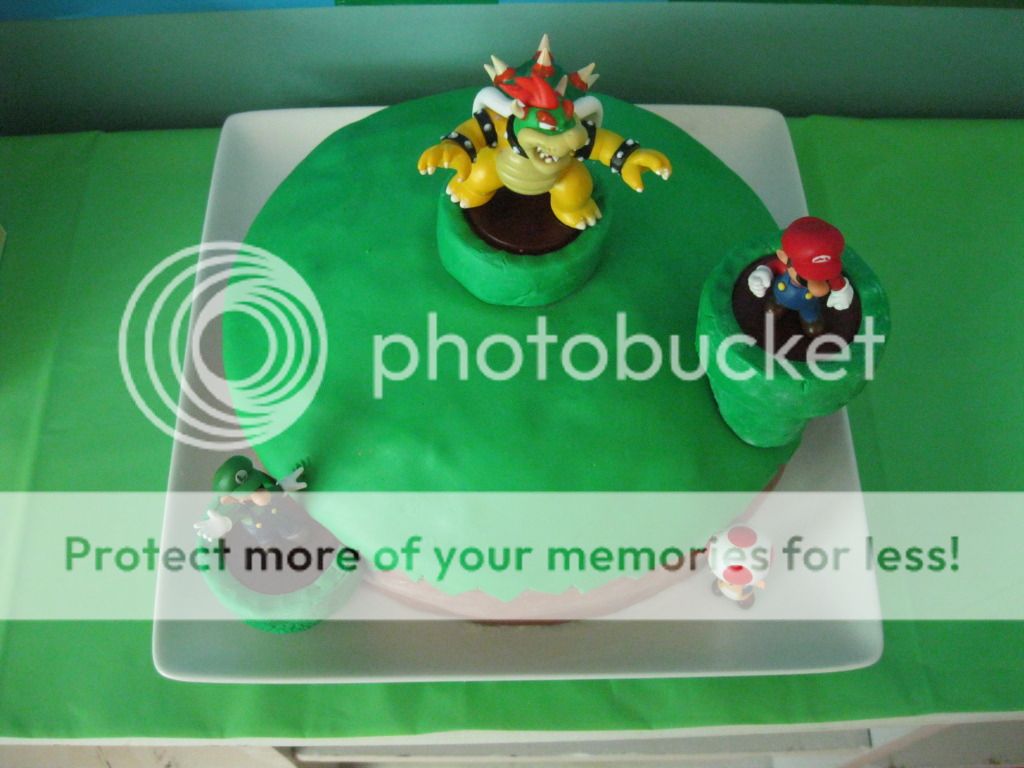
Video Game Party {the cake}


2 round cake layers, a nice rounded one for the top
Frosting of your choice
Chocolate Chips (opt)
Classic-flat bottom cake ice cream cones
Action figures :)
1. Frost your cake as you normally would :)
2. Fondant...follow the directions on the link {scroll down for the recipe} Add food coloring to get the desired effect. I actually melted a handful mini chocolate chips into the marshmallow/water mixture before adding the powdered sugar for the brown fondant...I was in a bind and it worked great...tasted pretty good too. Brown food coloring will work just as well:)
Roll out a thin strip of brown fondant that is slightly larger then the height of your cake {so the green will overlap}. Wrap around your cake and gently press to hold.
Next roll out a thin circle of green fondant, again a little bigger than the diameter of your cake. Carefully apply to the top of your cake. Use scissors to cut away excess to form the "grass" top.
3. For the pipes, trim classic cake ice cream cones to fit your cake {see above pictures}. Use a serrated knife and saw back and forth to keep from breaking your cones {it's good to have a few extra on hand}. To wrap in fondant, wet the cone VERY LITTLE to help the fondant stick, then mold the fondant around the cone. Use toothpicks or skewers through the center of the cones to hold the "pipes" in place.
4. Last, place your figures...the ones I used had a base that fit the open cones perfectly. And add candles at the last minute :)


7.05.2012
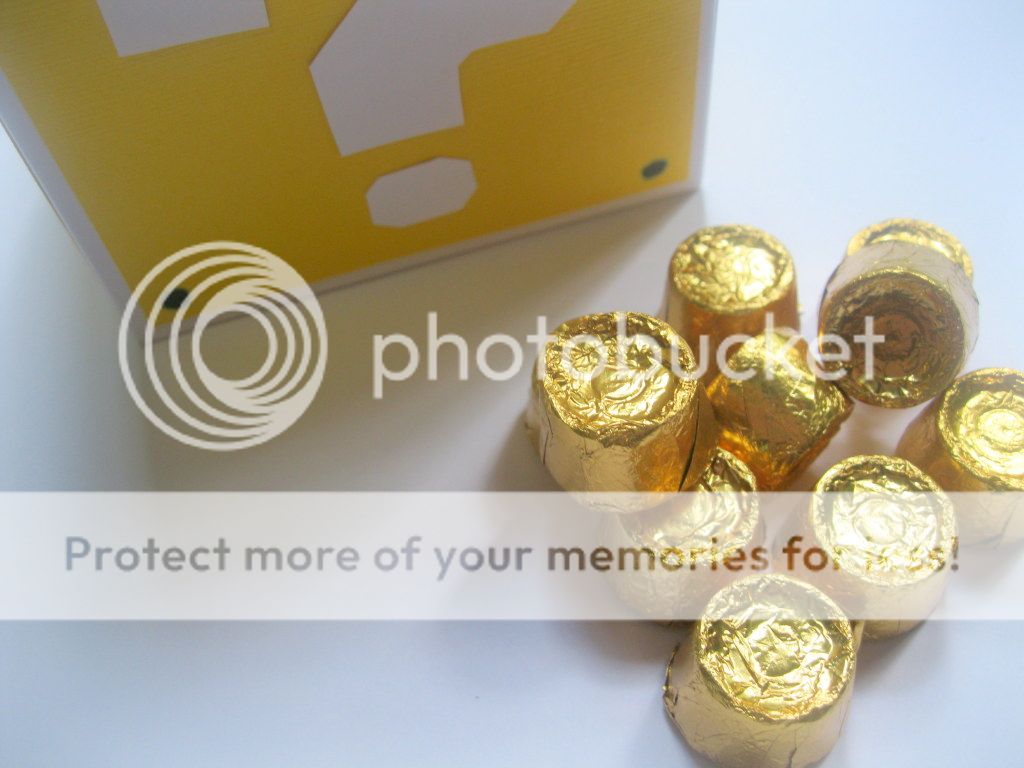
Video Game Party {the favors}

Here's how to make your own....

>4 x 4 x 4-inch plain white boxes (mug size...look for them near the gift bags at your local craft stores...aka Michael's, they come flat so you will have to assemble them)
>Bright yellow card stock, cut into 5 3/4-inch squares, you will need 5 squares per box, so plan accordingly
>White card stock, cut into question marks. You will need 5 question marks per box also...this is a little time consuming, but the end product is worth it! I used this to make a template...you will need to re-size your question mark to fit your boxes.
>Black marker
Assembly is simple, after your pieces are cut out, affix your question mark in the center of each yellow square. Then a yellow square to each side (except the bottom) of your assembled boxes. Carefully draw a black dot in each corner. And you're ready to go!

6.21.2012
Summer Style
I love to decorate seasonally. Summer, to me, should be light and fun with lots of color and a touch of vintage. Here are some of my favorites from some great shops on Etsy....

1. Fantastic candlesticks from Gleaming Renditions
2. Document your summer travels on this chalk board map by Dirtsa Studio
3. Beautiful bowls by Wind and Willow Home perfect for entertaining this summer
4. Who doesn't like chevron stripes? by MMIM
5. An easy seasonal change...recover your pillows! by MoGirl Designs
6. These chocolate filled candy seashells go beyond "too pretty to eat" (this shop is AMAZING) Andie's Specialty Sweets
7. Charming vintage-look coasters by Mayagencic
8. Loving this hanging, almost nautical candle holder by lesliepapafox
9. Beautiful quilt to add a little color to your room by Aunti JoJo's
10. Perfect vintage napkins for your summer party or picnic at Cool Vintage Finds
11. Display your summer memories and photos on this indoor clothesline kit by Heart and Handmade 2
12. Great for a picnic, even better for creative storage...basket by Dew Drop Daisies
13. Succulents, maybe the only plant I can keep alive...this one from So Succulent
14. A fun and colorful print by Happee Monkey
15. Sometimes (a lot of the time) I choose books just by color...make your bookcases beautiful with this instant collection of vintage books from Hampton House Vintage
16. Perfectly summery wreath by The Baker's Daughter
{I receive no compensation for items featured on my blog, I just like what I see}
6.20.2012
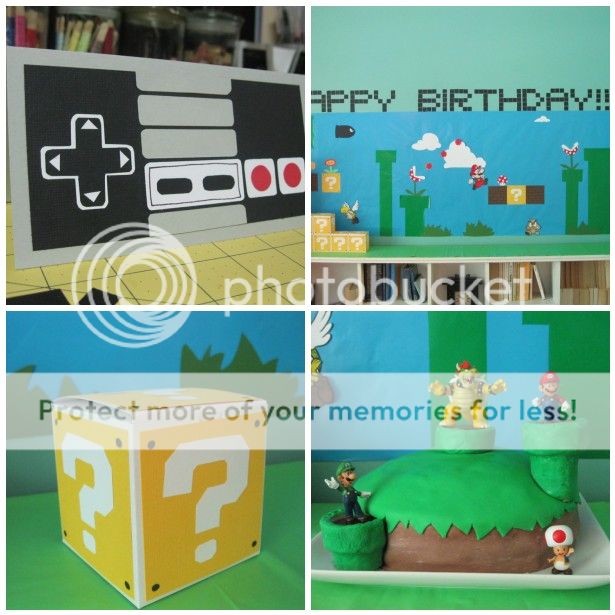
Video Game Party {the decorations}
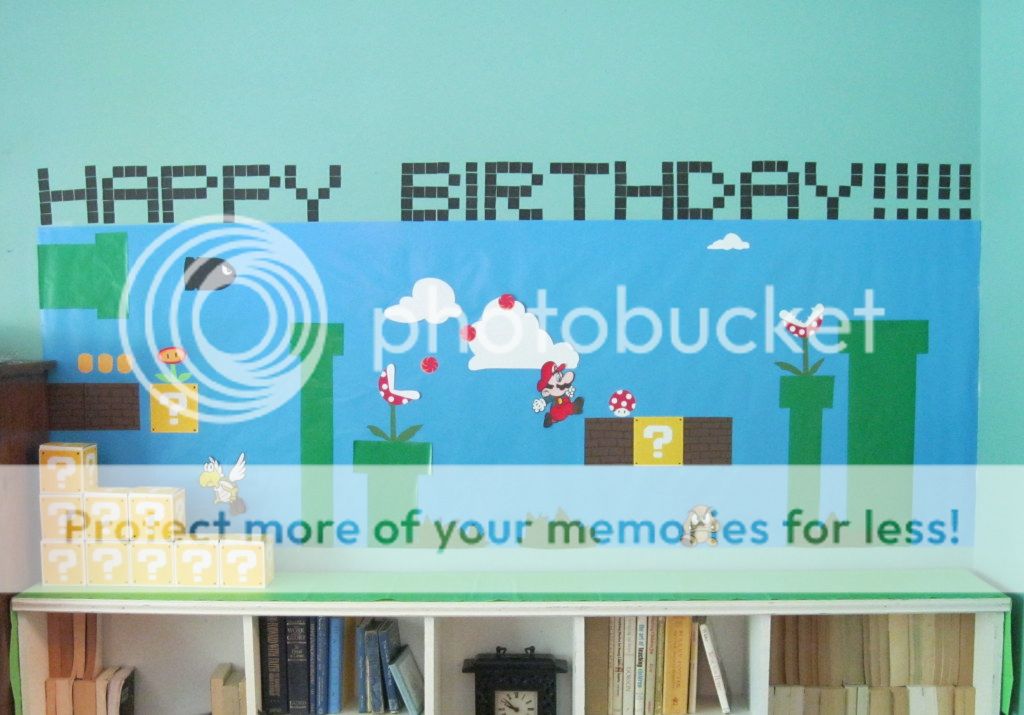
I chose to do one focus wall, with lots of impact for this party. The mural was really quite easy to put together & I was super happy with the results. {watch for the next post on how to make the ? mark block favor boxes}
First off I made a sketch, I wanted a general idea of how I wanted it to look on the wall. A few changes were made here and there, but it's always good to start out with a plan :)
After I hung the blue paper up on the wall, I just started adding the elements.
The pipes are cut from green wrapping paper (just use a large ruler to measure & get your lines straight...a clear quilting ruler works great here).
The clouds, grass clumps, coins and fire-power plant are free form shapes cut from card stock...as are the blocks (simple squares, with either a question mark...see favor box tutorial...or hand drawn lines to form bricks).
For the Piranha plants & bomb, I used images from online and made a simple template, layering colors to get the right effect.
I cheated with the Mario, Goomba, and Turtle, just printing off coloring pages to size, coloring them in & cutting them out.

The "Happy Birthday!!!" took a bit more time, but I think it is well worth it. First I printed off the message in Unibody 8 to use as a "map". I then taped 1 inch black squares {electrical tape would work great here) above the mural to form the words. After getting the first few letters done, it was easy going.

I always use my kids to judge my ideas/projects and this one got a big AWE-some!!! {which really makes it all worth it}

6.13.2012
Video Game Party {the invitations}
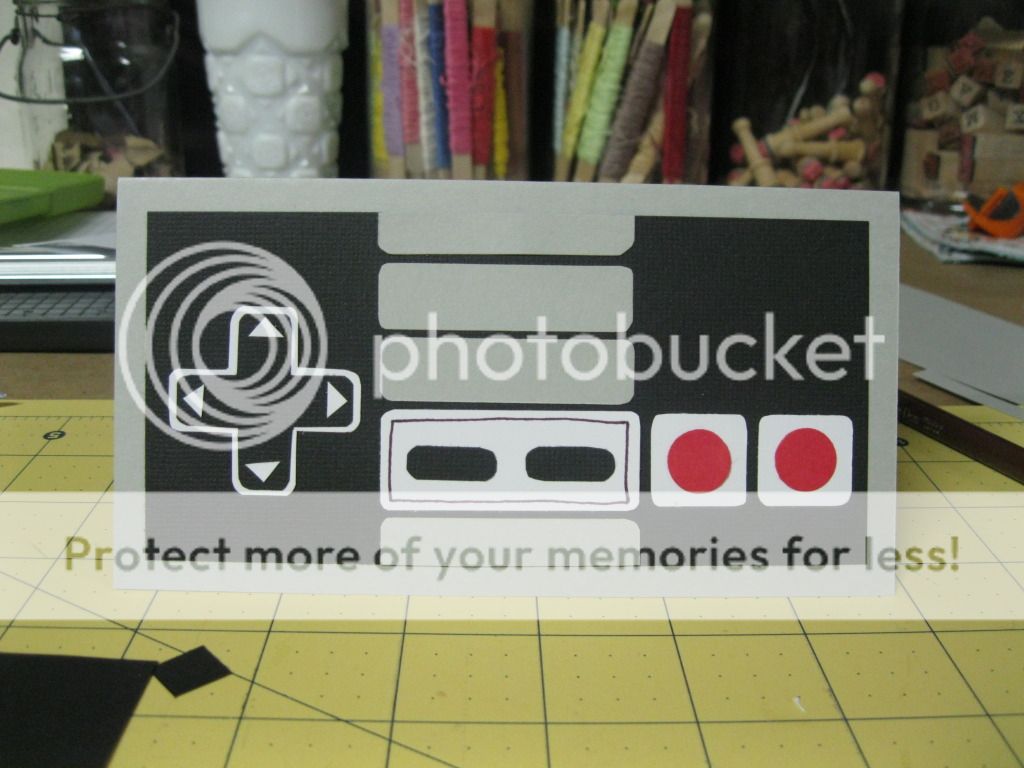
This is a small invite, only 6.25 x 3.5 inches, that fits into a standard letter envelope. It's simply layered card stock, with a little black hand outlining in the center. A template for you to use is below, click on the link to download or print {for non-commercial use only please!}
I printed my party info inside each card before assembly (remember to adjust your margins & print out a draft to make sure it all lines up right). You can just as easily write or stamp the party info on the inside. I used this great (free) video-game looking font: Unibody 8
Invitation Template Inviation Layout

Video Game Birthday Party
In the next few posts, you'll see how it all came together...

5.01.2012
400 "likes"
To celebrate hitting our 400th 'like' on Facebook I'm offering FREE SHIPPING at Anticipation Cards to celebrate!

Enter the code:
FACEBOOK400
at checkout to redeem.
(coupon good until 9:00 a.m. est 5-8-12)

To receive updates about promotions and new shop items you can follow me here:

Thank you!
Subscribe to:
Posts (Atom)